
Create a Field or Category Scope
Before you can place data with a Slot, create the Field or Category Scope you want to use. Pick one below to see how to create it, step by step.
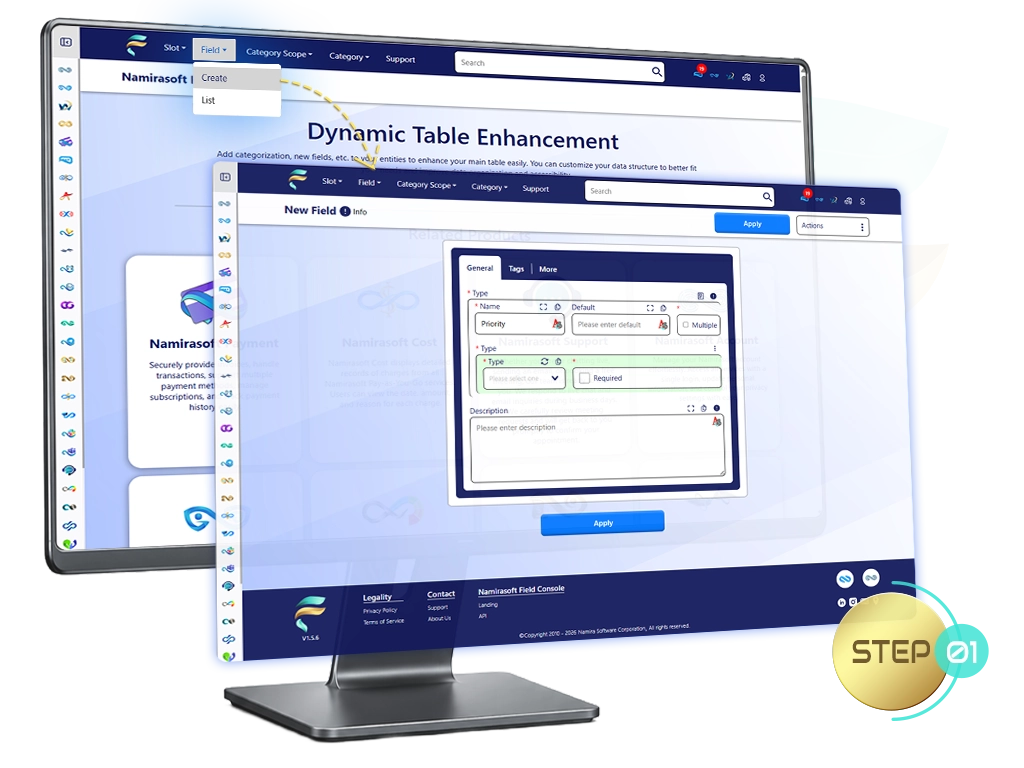
Step 1: Start a New Field
- Open the Namirasoft Field Console and select Field → Create.
- Type a Name so you can find the Field later, for example Priority.
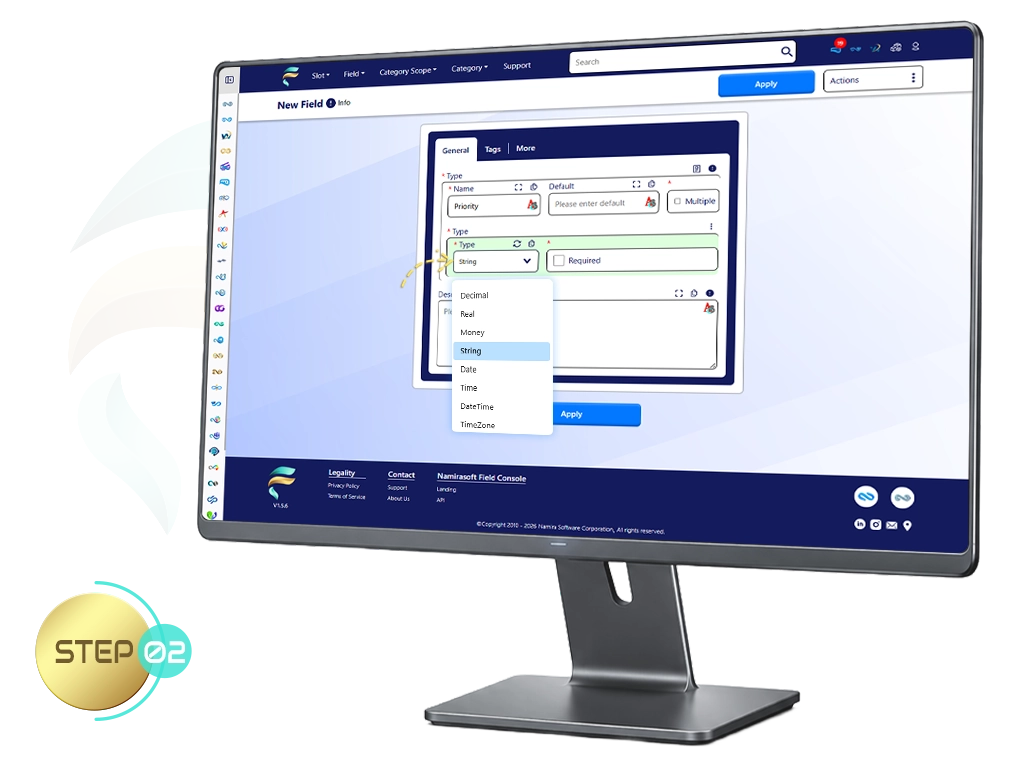
Step 2: Choose the Type
- The Type is the kind of value the Field holds, such as Text, Integer, or Date. It decides what people are allowed to enter.
- Which type should I choose?
- Select the Type from the dropdown.
Step 3: Set the Options
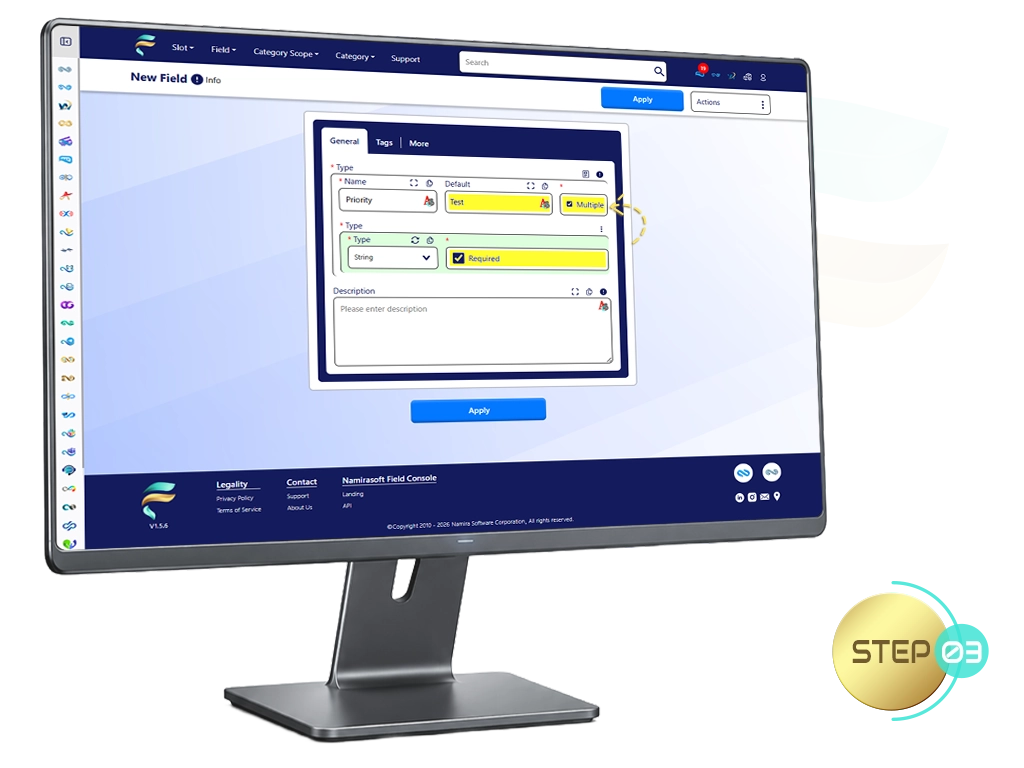
- Set a Default value for the Field if you want one filled in automatically.
- Turn on Required if people must fill the Field in.
- Turn on Multiple to let the Field hold more than one value.
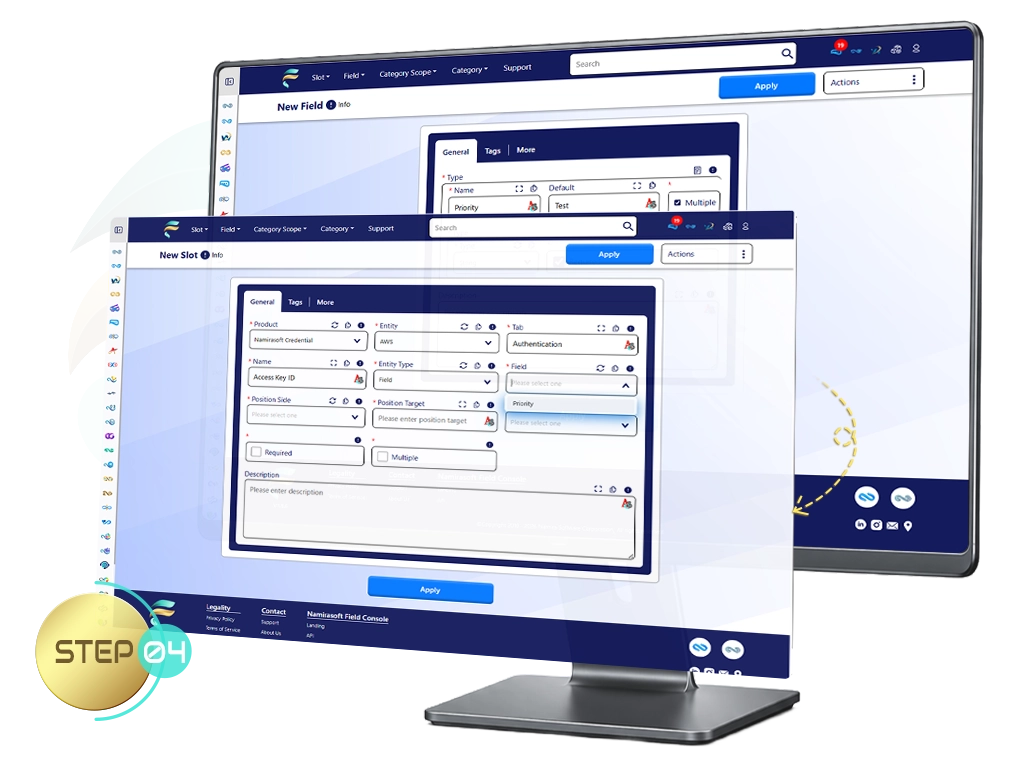
Step 4: Apply and Return to the Slot
- Click Apply to save the Field.
- Return to the Slot tab, then select your new Field to place it.
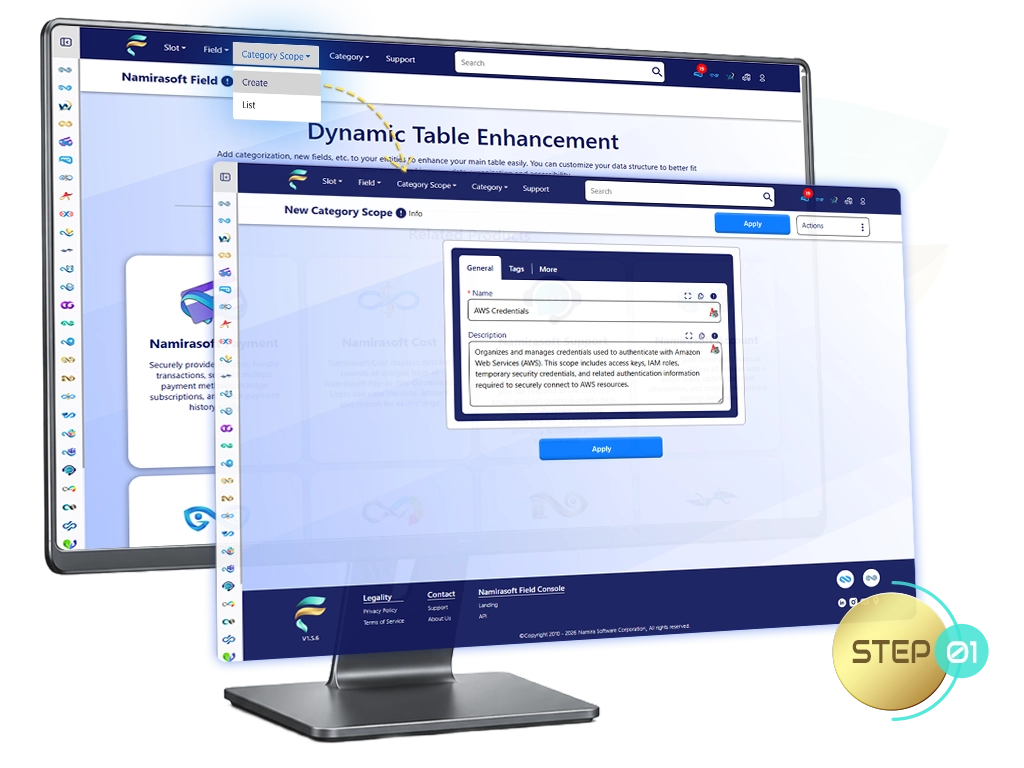
Step 1: Create the Category Scope
- Open your Namirasoft Field Console, then select Category Scope → Create.
- Type a Name and an optional Description.
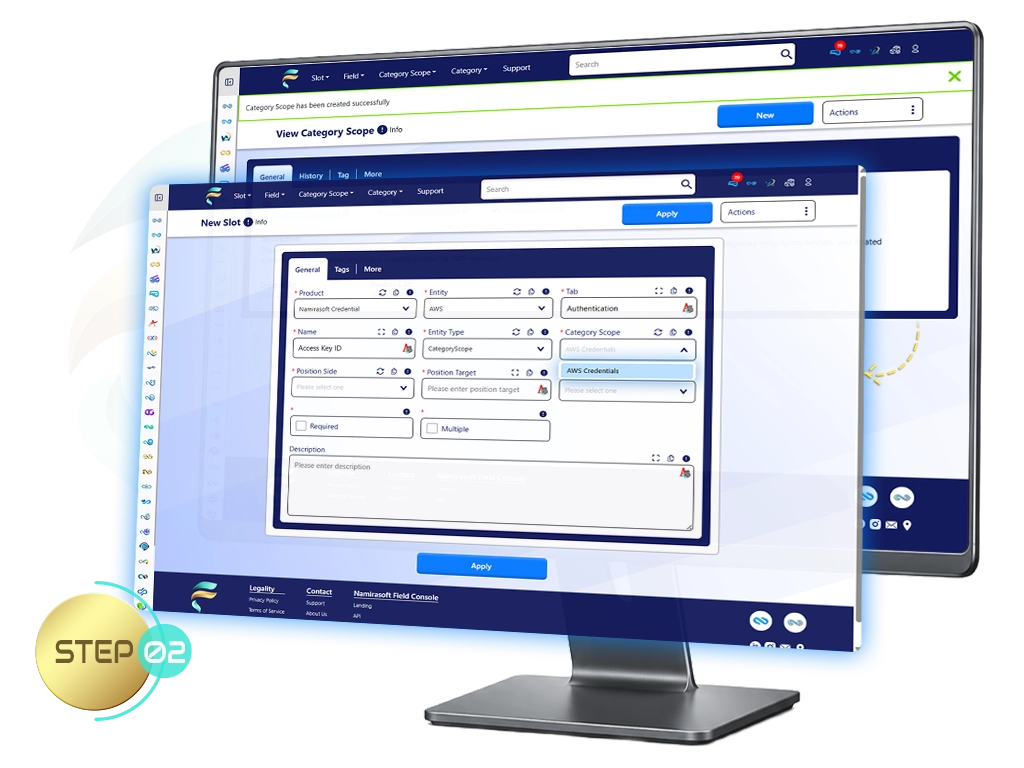
Step 2: Apply and Return to the Slot
- Click Apply to save your Category Scope.
- Return to the Slot tab, then select your new Category Scope to place it.
Create a Field or Category Scope FAQs
Answers to common questions about creating Fields and Category Scopes.
1. Do I need to create a Field or Category Scope before making a Slot?
Yes. A Slot places an existing Field or Category Scope, so create the one you need first.

2. Can I reuse the same Field or Category Scope in more than one Slot?
Yes. Define it once, then place it wherever you need it with different Slots.
3. What is the difference between a Field and a Category Scope?
A Field captures a single value, such as a number or text. A Category Scope offers a set of choices, such as Production or Staging.
4. Can I edit or delete a Field or Category Scope later?
Yes. You have full control and can edit or delete them at any time.
Ready to Place It with a Slot?
Head back to the guide and continue creating your Slot.