How to Get Azure Client ID and Tenant ID
Obtain your Azure Client ID and Tenant ID to connect Namirasoft Credential.
Register an application in Microsoft Azure so Namirasoft Credential can securely store your Azure credentials for use across Namirasoft services such as Namirasoft Bill Watch, Namirasoft Teams Sender, and Namirasoft NWS Volume.
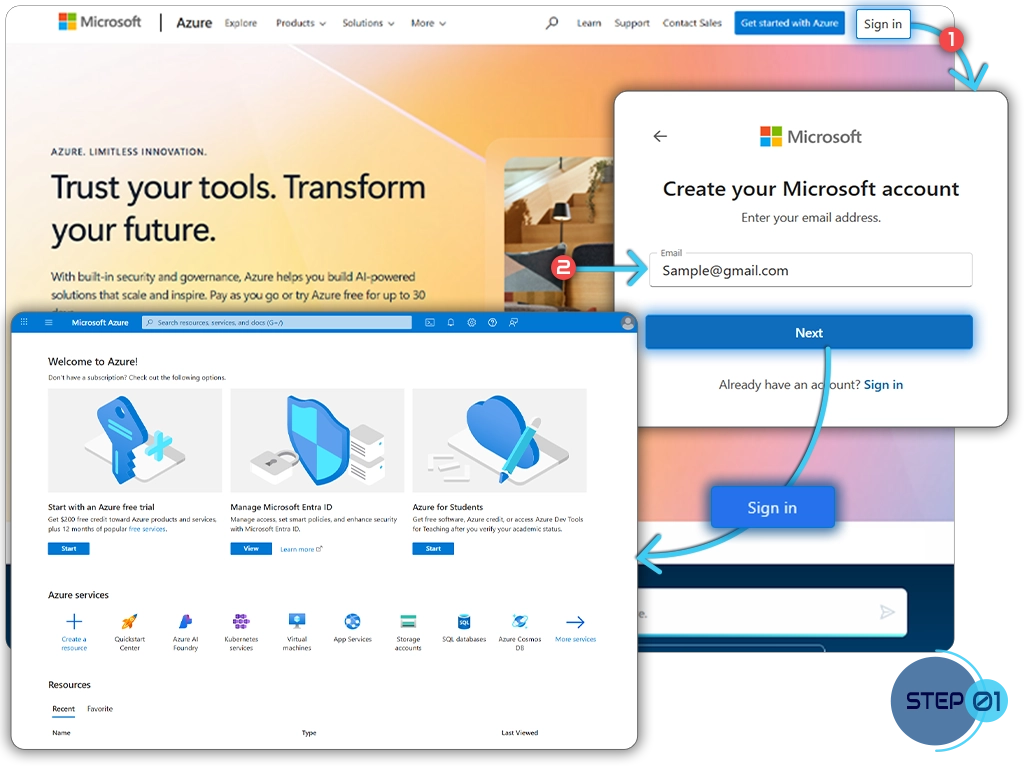
Step 1: Log in to Microsoft Azure
Open the Microsoft Azure Portal and sign in with an account that has administrative privileges for app registration.
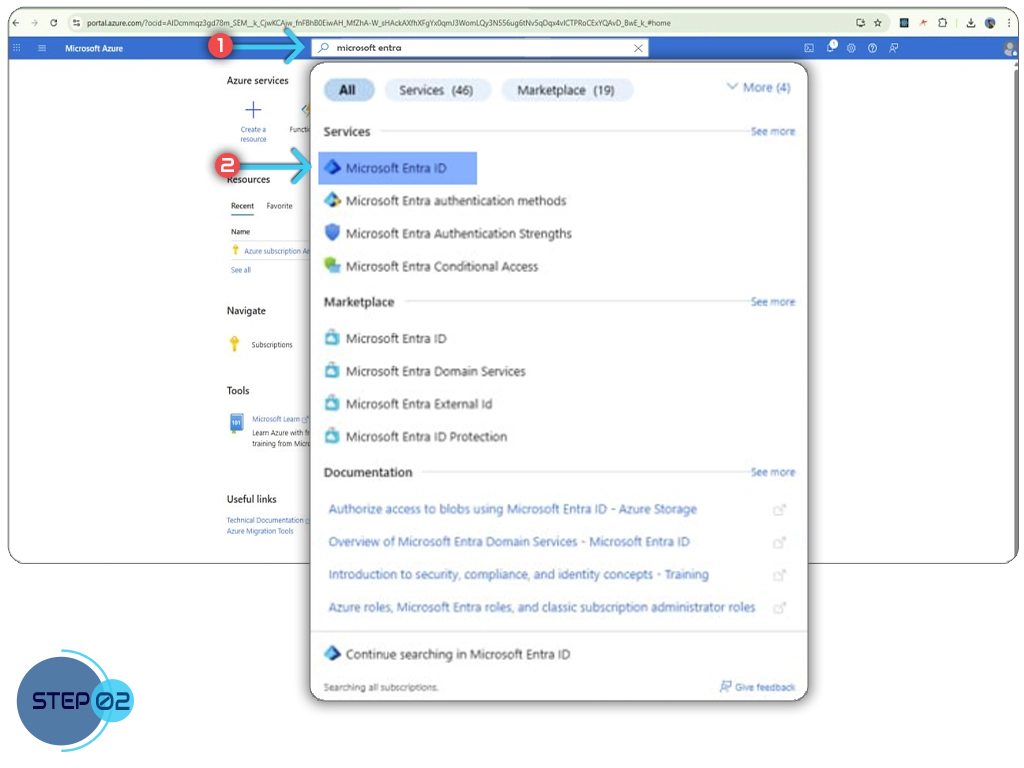
Step 2: Access Microsoft Entra ID
In the Azure Portal, type “Microsoft Entra ID” in the search bar and select it from the results. This is where you will register your application and manage access credentials.
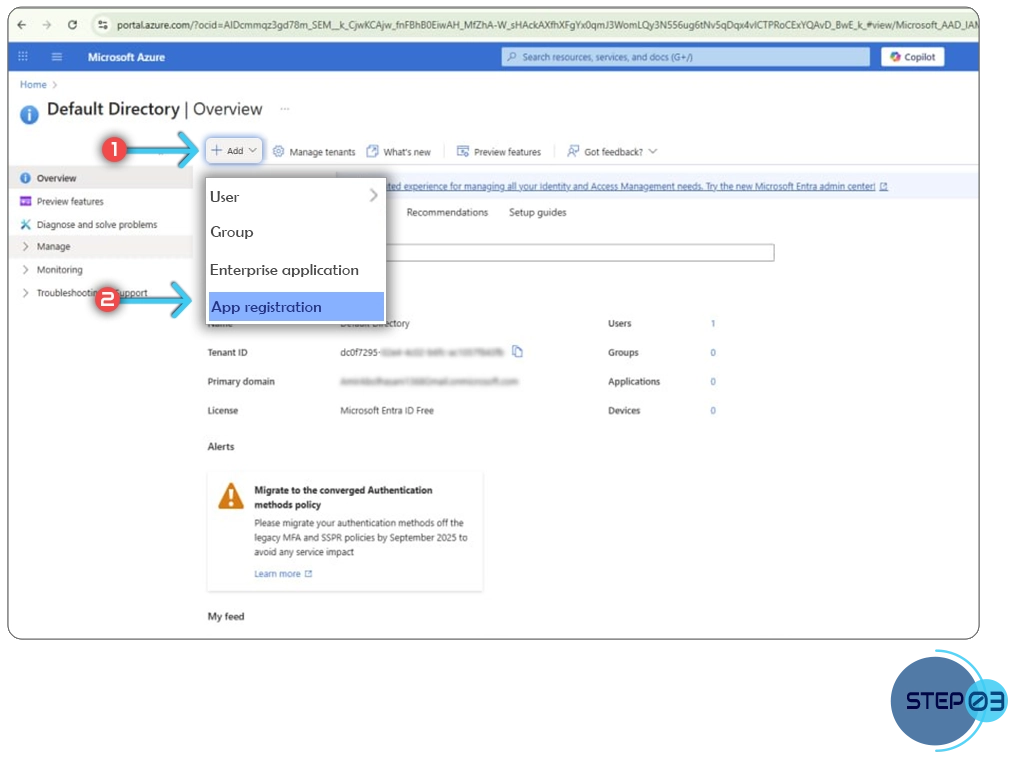
Step 3: Start App Registration
-
In the Microsoft Entra ID page, click Add.
-
Select App Registration.
This begins the process of creating a new application, which will generate your Client ID and Tenant ID.
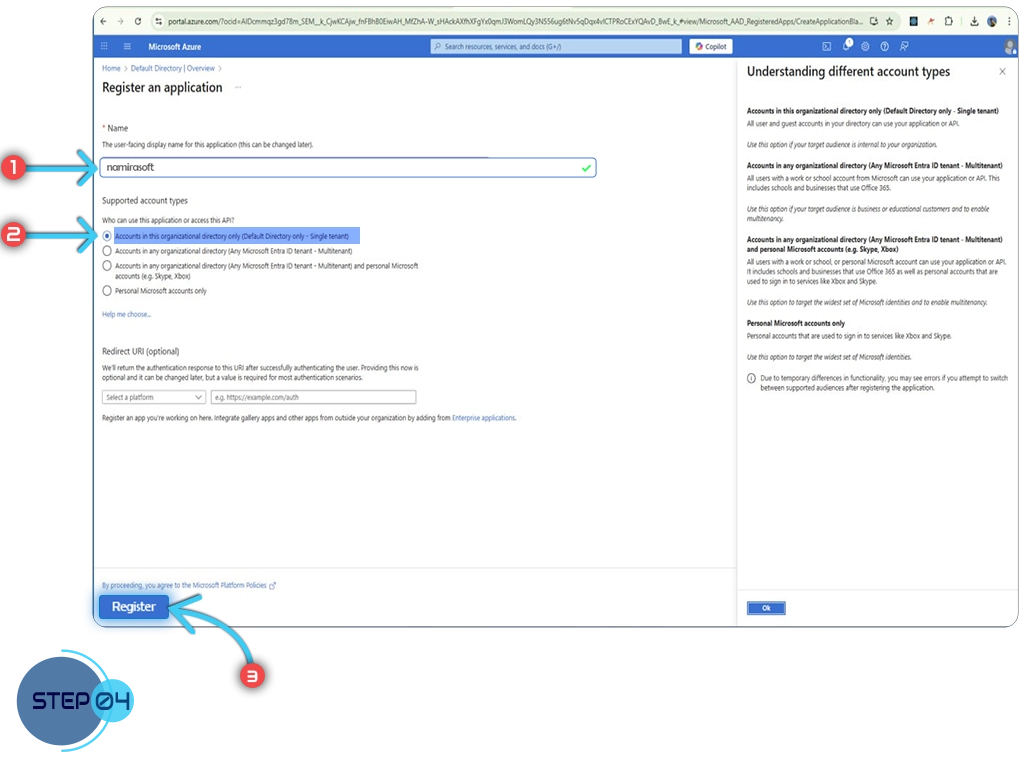
Step 4: Configure and Register Your App
- Enter a Name for your application to identify it later.
- Choose the Supported Account Types according to your needs.
- Click Register to complete the app registration.
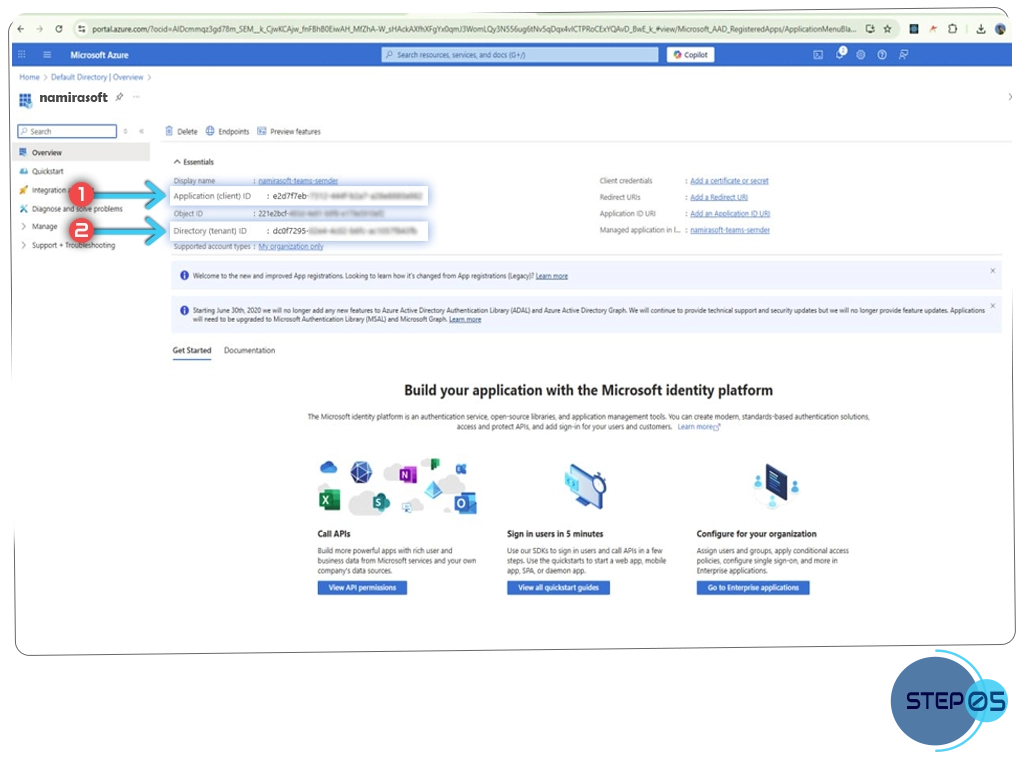
Step 5: Copy Client ID and Tenant ID
After registration, you will be directed to the App Overview page.
Copy both of the following values:
-
Application (client) ID: this will be your Client ID.
-
Directory (tenant) ID: this will be your Tenant ID.
Once you have obtained both IDs, proceed to How to Get Azure Client Secret to complete your Azure credential setup.