How to Get Azure Client Secret
Obtain your Azure Client Secret to connect Namirasoft Credential.
Create a Client Secret in Microsoft Azure so Namirasoft Credential can securely store your Azure credentials for use across Namirasoft services such as Namirasoft Bill Watch, Namirasoft Teams Sender, and Namirasoft NWS Volume.
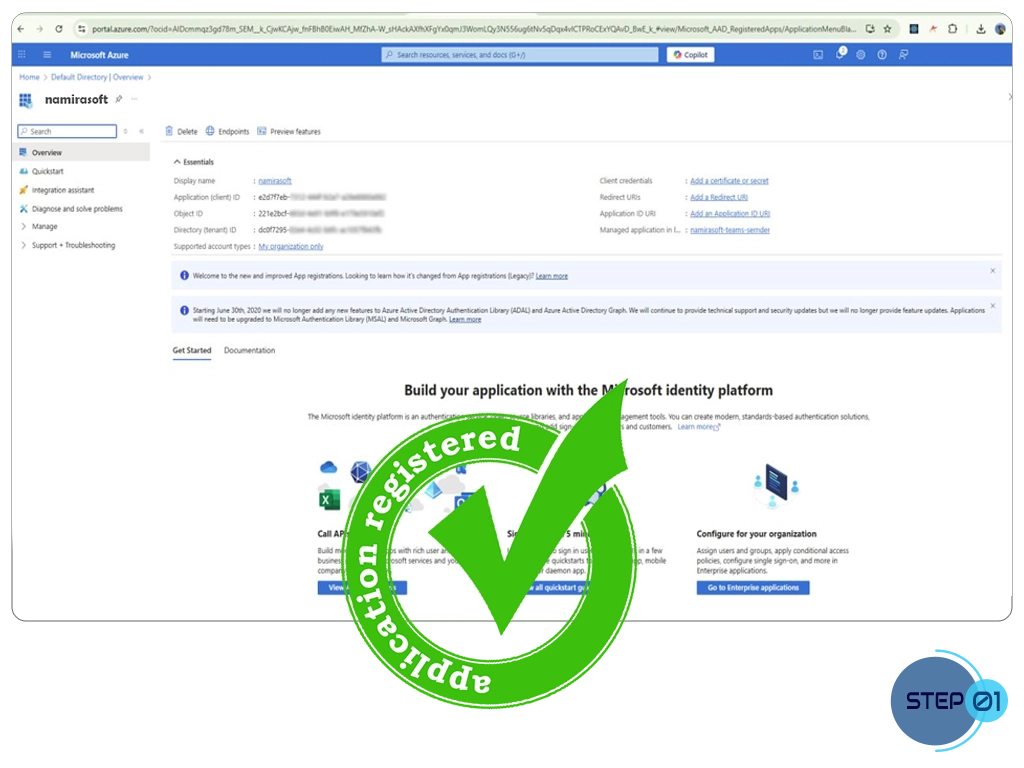
Step 1: Ensure You Have a Registered App
Before creating a Client Secret, make sure you already have a registered application in the Azure Portal.
If not, see: How to Get Client ID and Tenant ID?
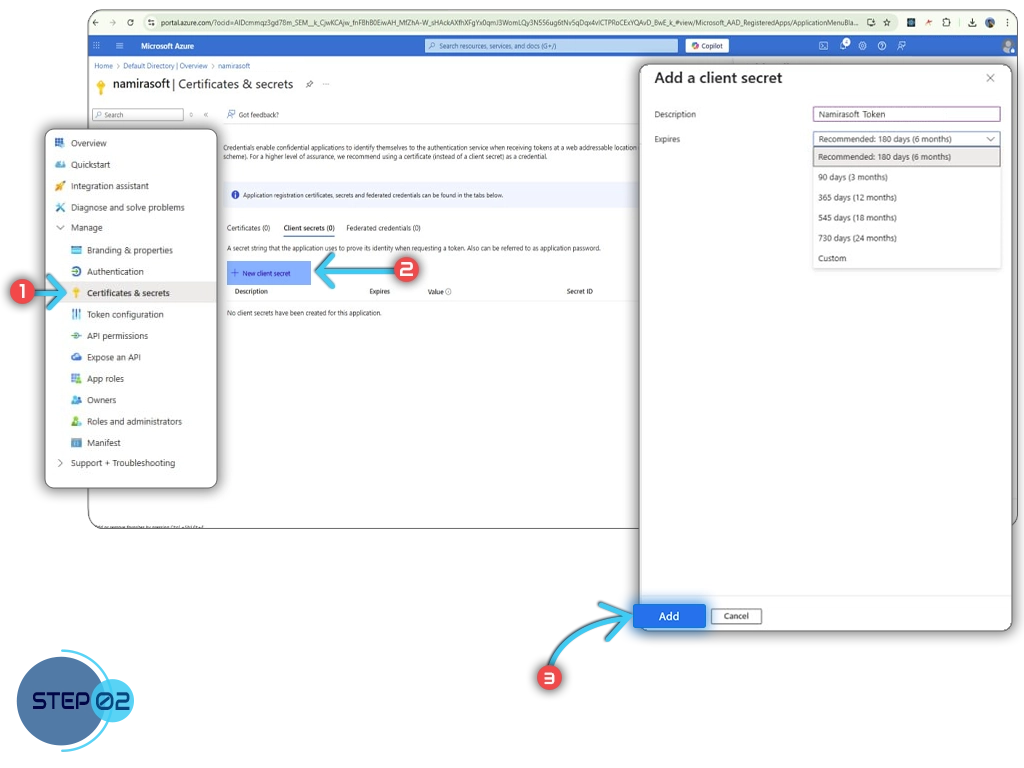
Step 2: Add a Client Secret
- Go to your app’s Overview page in the Azure Portal.
- Select Add a certificate or secret from the menu on the right.
- In the Client Secrets tab, click Add new client secret.
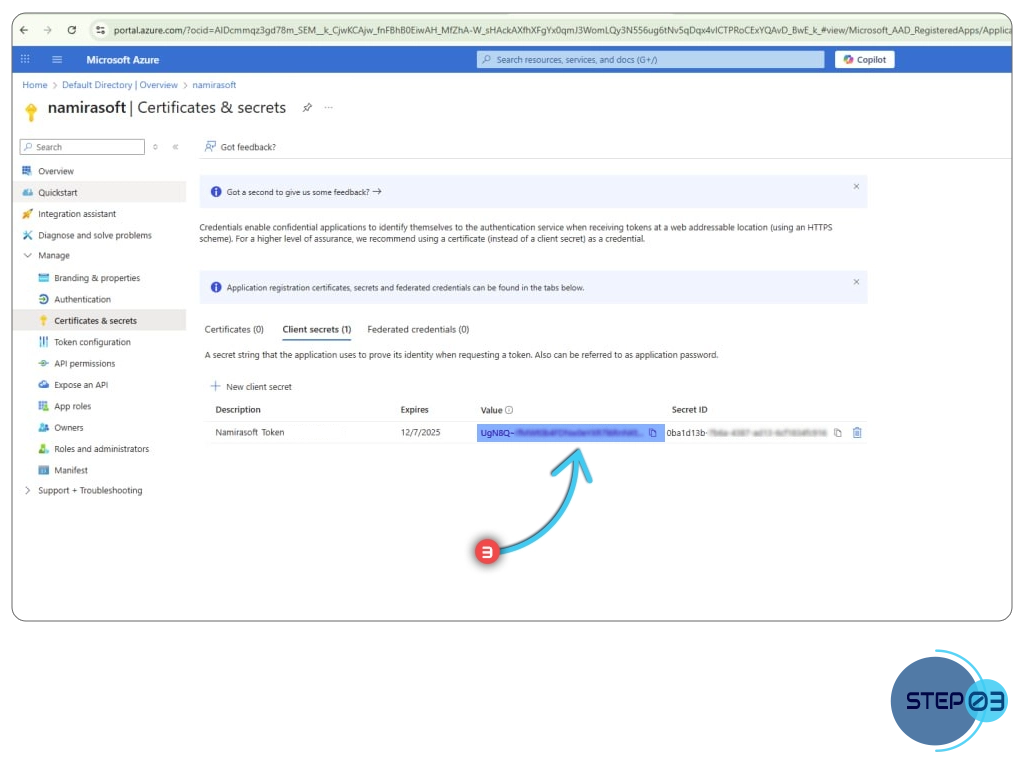
Step 3: Copy the Client Secret Value
After creating the Client Secret, it will appear in the list under the Client Secrets tab.
Copy the Value (not the Secret ID). This value is your Azure Client Secret.
Step 4: Grant the Role for Your Application
- In the Azure Portal, open the Storage account your application will use.
- Select Access control (IAM), click Add, then choose Add role assignment.
- In the Role tab, select the role for your Namirasoft application. Each application uses its own role:
Namirasoft NWS Volume (Blob storage)
Storage Blob Data Contributor
Namirasoft NWS Volume (File shares)Storage File Data SMB Share Contributor
- On the Members tab, select your registered app, then click Review + assign.