How to Create AWS Access Keys
To connect Namirasoft applications with your AWS account, you need an Access Key and a Secret Key. These act like a username and password for secure programmatic access.
Follow the steps below to create access keys in your AWS account.

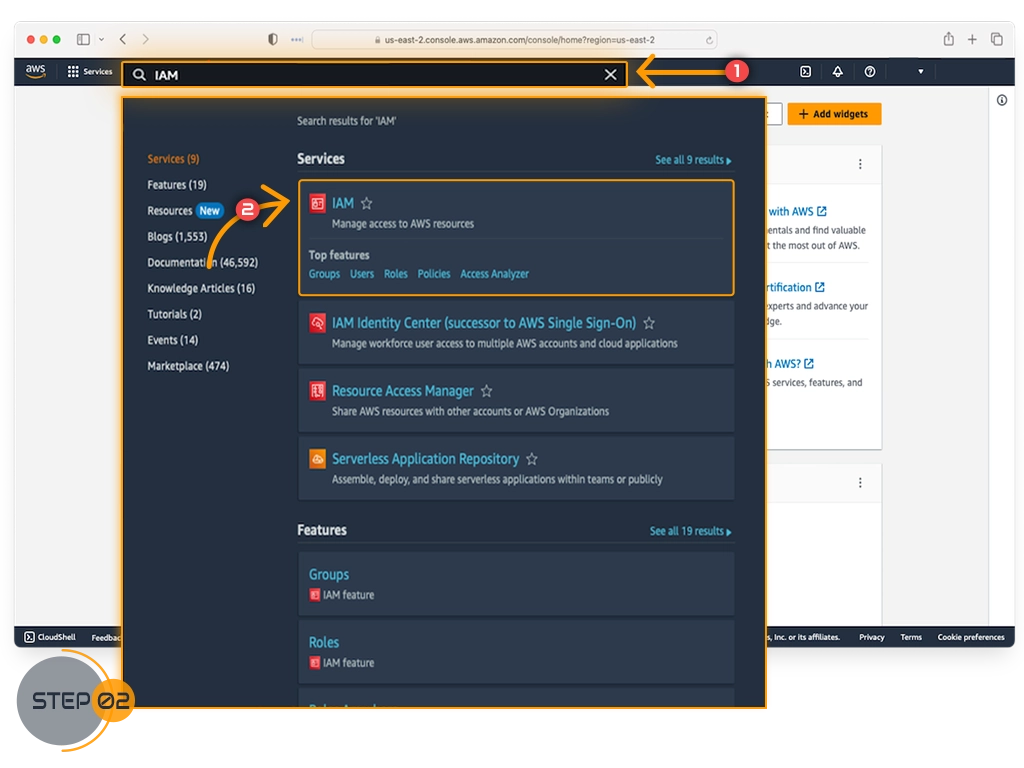
Step 2: Open the IAM Service
In the search bar at the top, type IAM and select IAM (Identity and Access Management).
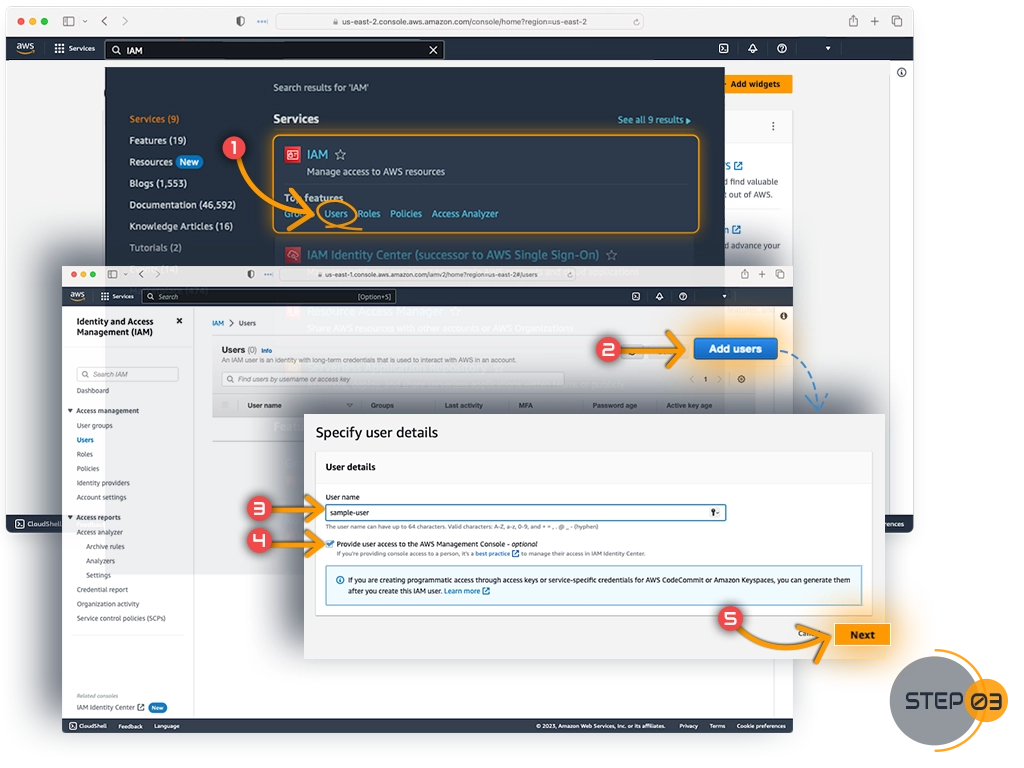
Step 3: Add a New User
1. In the IAM dashboard, click Users from the left menu.
2. Click Add user.
3. Enter a username (for example, Namirasoft Bill Watch).
4. Select Programmatic access only (you do not need console access).
5. Click Next.
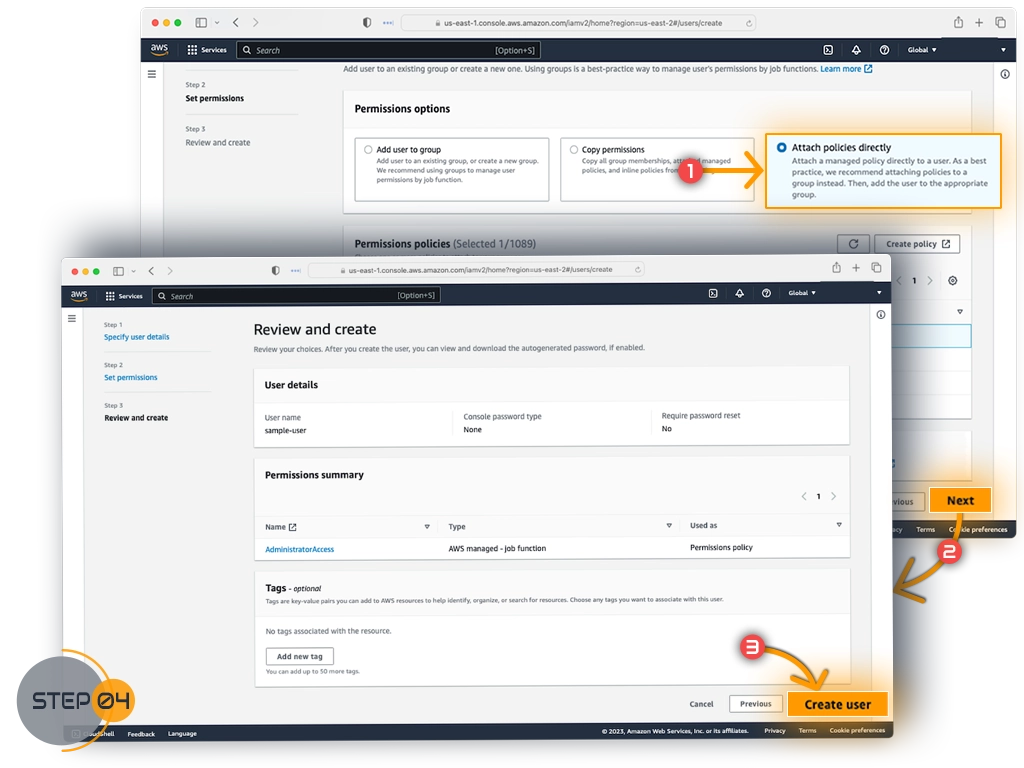
Step 4: Set Permissions
Namirasoft Bill Watch requires specific AWS permissions to access billing and usage data.
1. On the Set permissions screen, choose Attach policies directly.
2. Instead of selecting a predefined policy, copy and paste the custom policy below into the JSON editor:
{
  "Version": "2012-10-17",
  "Statement": [
    {
      "Sid": "AllowCostExplorerAccess",
      "Effect": "Allow",
      "Action": [
        "ce:GetCostAndUsage",
        "aws-portal:ViewBilling",
        "cur:DescribeReportDefinitions",
        "budgets:ViewBudget"
      ],
      "Resource": "*"
    }
  ]
}
3. Click Next, review, and then Create user.
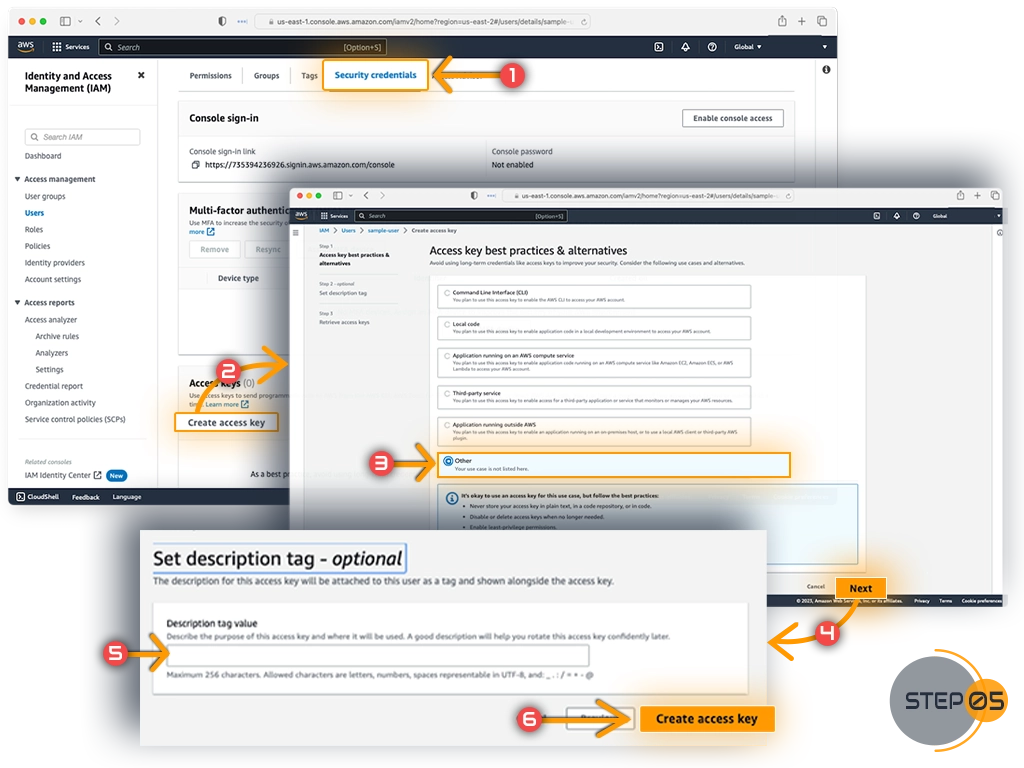
Step 5: Create Access Keys
1. While viewing the user, go to the Security credentials tab.
2. Scroll to Access keys and click Create access key.
3. Choose the use case (you can select Other if not listed).
4. Optionally enter a description for the key.
5. Click Create access key.
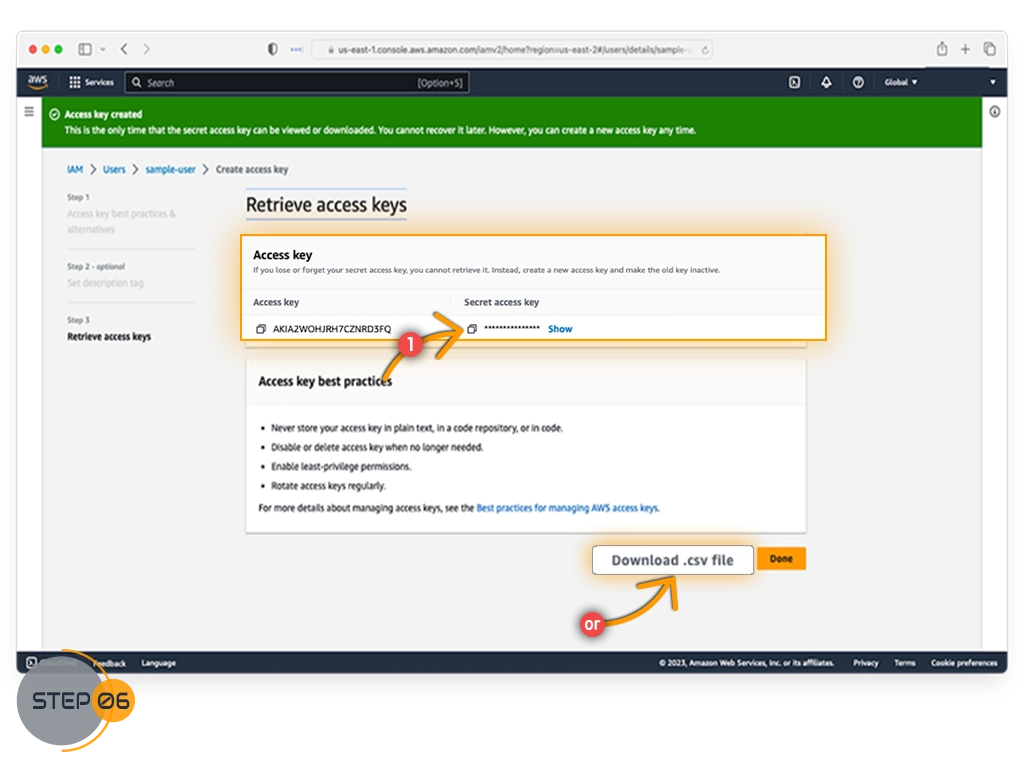
Step 6: Retrieve and Save Your Keys
AWS will show the Access Key and Secret Key.
⚠️ Important: The Secret Key is displayed only once. Download the .csv file or copy the keys and store them safely.